Task:
Deploy new application from a GitHub/GitLab repository via OCP web console.
Steps:
1. Create the secret (if not already done):
Notes:
- OCP supports multiple types, opaque (indicating w/o validation) is the default.
- Options include basic auth and ssh-key
- Requires that the token/password or the private SSH key is already set-up at GitHub.
- If the ID used w/OCP will only pull and not write, leave Allow write access unchecked.
a. OC Terminal example with Basic Authentication username and token/password:
$ oc secrets new-basicauth github-credentials --username=<yourgithubusername> --password=<yourgithubpassword>
<success returns: secret/github-credentials
b. OC Terminal example with SSH Private Key after Pub Key pasted into the Add Deploy Key page on GitHub:
$ c create secret generic github-credentials --from-file=ssh-privatekey=git-repo-privatekey.key --type=kubernetes.io/ssh-auth
<success returns: secret/github-credentials
2. Navigate to the Deploy Image screen:
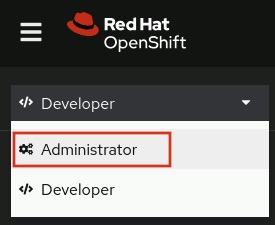
- OCP Web Console (Home) --> switch to Developer perspective
- Continue --> Projects

- Click the + icon (top toolbar) --> In the dropdown, click Import from Git (dropdown option)
Notes:
The quick plus icon dropdown has three options:
- Import YAML file (which can also do JSON definitions)
- Import from Git repository (can build from source)
- Container images (container registries)
The Add to Project dropdown also has three options:
- Browse Catalog
- Deploy Image (same container registries option as the Container Images under the plus)
- Import YAML/JSON
3. On the Deploy Git page, enter the following:
--> Under Git (heading)
- Git Repo URL: <git_fqdn>/<project_user_folder>/<appname.git>
- Git type: GitHub
Note:
- Multiple types are available: GitHub, GitLab, BitBucket, Gitea, or Other
- Context dir: <apps>/<app_folder>/<app_name>
Note:
- The Context dir is the build location subdirectory. e.g. /apps/my-app/php-appname
Source Secret: github-credentials
- Application name: <enter_app_name>
- Name: <enter_app_name>
Note:
- As indicated on the screen, application name is the name group for labeling resources, and Name is the unique app name in OCP
--> Under Advanced Options:
- Target Port: <enter_port_number>
- Create a route: <checked>
- Click Create (button)
4. After OCP automatically redirects you to the Topology page, verify the application pods are running.
Notes:
- When all pods are running, the circle around the app pod icon(s) will change from light blue to dark blue.
- Click the open URL icon (top right box icon with arrow) to confirm the route is working.
previous page
|