Instructions for configuring Netscape Communicator to check your mindwatering mail account.
1. Start Netscape Communicator or Netscape Messenger.
(The instructions are the same either way.)
2. On the menu bar at the top. Choose "Edit"
3. Choose the "Preferences" option.
4. Click the "+" next to Mail & Newsgroup to expose the sub category option screens. (see figure below)
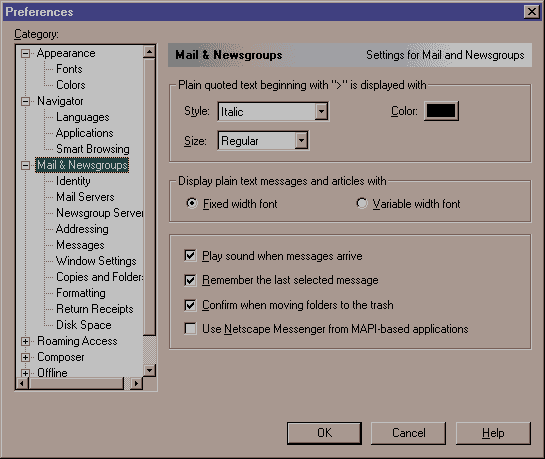
5. Click (select) the "Identity" sub option for the Identity screen. (see figure below)
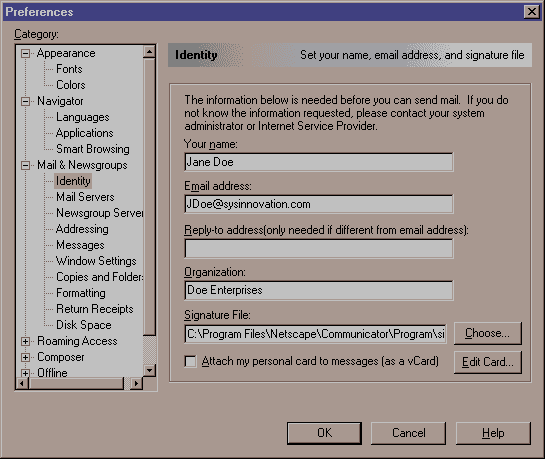
6. In the "Your name" box, put your name as you want to be known.
In the "Email address" box, put your full email.
In the "Organization" box, put your business name (if you have one).
7. Click (select) the "Mail Servers" sub option for the mail server configuration screen. (see figure below)
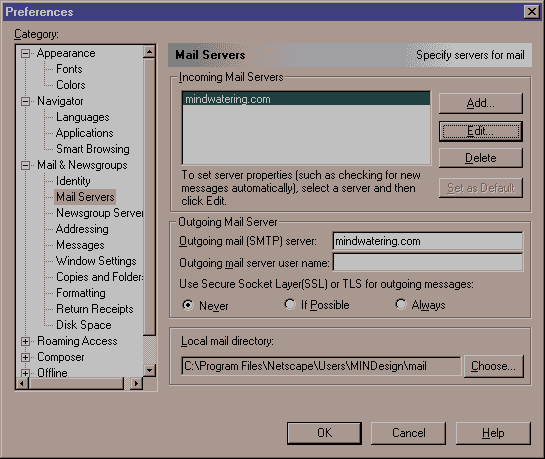
8. If you are switching from another email account, under "Incoming Mail Servers", highlight your existing mail (POP) account and press "Edit..."
If you have nothing under "Incoming Mail Servers", press "Add..." Either way, you need to fill in (or chage if editing) the server information in the following steps.
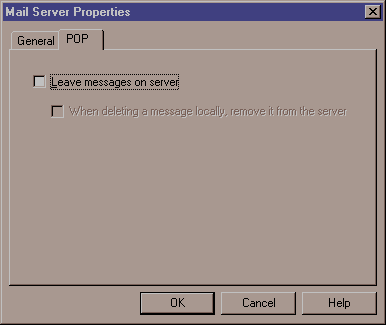
9. You should now see a "General" tab (selected) and a "POP" tag behind. (see figure below)
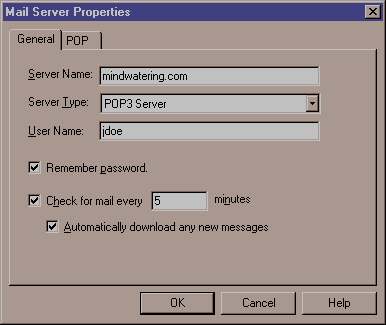
10. On the "General" tab, beside "Server Name", type in either "mindwatering.com" or "sysinnovation.com". (You should have received this information via an email or a telephone call.)
Beside "Server Type", leave as POP3 Server.
Beside "User Name", put your account name. (You should have also received this information in that same email or telephone call.)
Click (check on) the "Remember password" option, if you want Netscape to not prompt you for your password each time you start the Netscape Messenger.
Click (check on) "Check for mail every" and set the desired time freqency that Netscape looks and in your mailbox on the server for mail.
Click (check on) "Automatically download any new messages".
11. On the "POP" tab, beside "Leave messages on server", check it (on) ONLY if you have multiple locations (ex. work and home) where you check email and want this location to leave messages on the server, so that when you check mail at the other location, it downloads all the messages. This way one location has all the messages. (see figure below)
12. Press "OK" to keep those changes.
13. Back in the "Preferences" dialog box, beside "Outgoing mail (SMTP) server", put in the mail server for you Internet Service Provider (eg. RoadRunner, Earthlink, Mindspring, etc.). The format should be something like smtp.mindspring.com or smtp.nc.rr.com.
NOTE: Those of you behind business firewalls or proxy servers may have your own outgoing proxy server, too. In this case you will need your network administrator's help in this configuration..
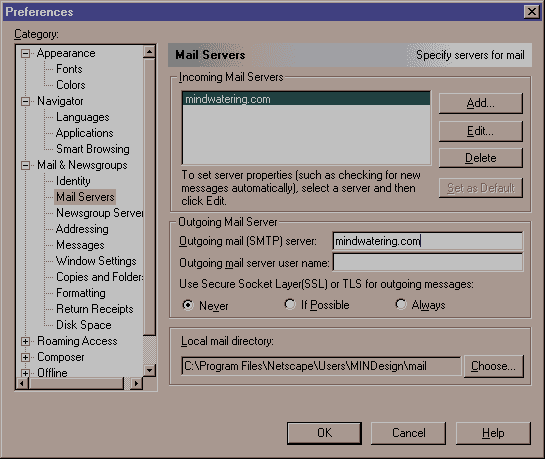
14. Leave the "Use Secure Socket Layer (SSL) or TLS for outgoing messages" option to "Never".
15. Press "OK" to complete this process.
The first time you check mail, either manually or because you filled in the automatic checking option, you will be asked for your password.
Enter it into the dialog box and press the "OK" button. If you checked (on) the "Remember Password" option above, it will not ask you for it again.
You mail is viewed in your "inbox". Your sent mail is viewed in your "sent" box. You can delete message from either box by highlighting the message and pressing delete. The deleted message is transfered to the "trash" folder/box, where it stays until you delete the trash.
previous page
|